Руководство для платформы Android
В этом руководстве показано, как настроить среду SDK для развертывания приложений Cordova для устройств на базе Android и как при необходимости использовать специфические для Android средства командной строки в вашем рабочем процессе построения приложений. Вам нужно установить Android SDK независимо от того, хотите ли вы использовать эти инструменты или использовать кросс-платформенный Cordova CLI для построения приложения. Для сравнения двух вариантов разработки см. Введение. Дополнительные сведения о CLI, см. "Интерфейс командной строки".
Требования и поддержка
Cordova для Android необходим Android SDK, который может быть установлен на операционных системах OS X, Linux или Windows. Смотрите системные требования Android SDK.
Cordova поддерживает Android 4.0.x (начиная с уровня Android API 14) и выше. Как правило версии Android перестают поддерживается Cordova после того как они опустится ниже 5% на панель распространения Google . Версии Android менее чем API уровня 10, и версии 3.x (Honeycomb, уровни API 11-13) упали значительно ниже этого 5%-го порога.
Установка инструментов Cordova
Если вы хотите использовать Android-ориентированные инструменты Cordova совместно с SDK, скачайте Cordova с cordova.apache.org. В противном случае этот раздел можно проигнорировать, если вы планируете использовать кросс-платформенное средство CLI, описанное в разделе "Интерфейс командной строки".
Страница для скачивания Cordova содержит различные архивы для каждой платформы. Убедитесь в том распаковываете соответствующий архив, android в данном случае, в пустой каталог. Соотвествующие выполняемые утилиты будут доступны в каталоге bin верхнего уровня. (Обратитесь при необходимости к README файлу за более подробными инструкциями.)
Эти инструменты командной строки позволят вам создавать, собирать и запускать приложения для Android. За информаций о дополнительных интерфейсах командной строки которые позволяют встраивать возможности плагинов среди разных платформ, смотрите раздел "Использование Plugman для управления расширениями". Смотрите раздел "Плагины приложения" для детальной информации о том как разрабатывать плагины.
Установите Java Development Kit (JDK)
Установить Java Development Kit (JDK) 7 или более поздней версии.
При установке на Windows, необходимо также задать переменную окружающей среды JAVA_HOME в соотвествии с каталогом установки JDK (например, C:\Program Files\Java\jdk1.7.0_75).
Установить Android SDK
Установите SDK Android Stand-alone SDK Tools или Android Studio. Продолжите с Android Studio если планируется разработка новых плагинов Cordova для Android или использовать встроенных средств для запуска и отладки на Android платформе. В противном случае Android Stand-alone SDK Tools вполне достаточно для построения и развертывания приложения на Android.
Подробные инструкции по установке доступны как часть установки.
Чтобы инструменты командной строки Cordova работали, или другое CLI которое основано на них, вам необходимо включить каталоги SDK tools и platform-tools в вашу переменную окружения PATH. На Mac, вы можете использовать текстовый редактор для создания или изменения файла ~/.bash_profile, добавив линию, наподобие нижеуказанной, в зависимости от того где установлен SDK:
export PATH=${PATH}:/Development/android-sdk/platform-tools:/Development/android-sdk/tools
Эта строка в ~/.bash_profile добавляет эти инструменты во вновь открытых окнах терминала. Если ваше окно терминала уже открыт в OSX, или чтобы избежать процедуры выхода/входа на Linux, выполните ниже указанную команду, чтобы сделать эти инструменты доступными в текущем окне терминала:
$ источника ~/.bash_profile
Чтобы изменить переменную окружения PATH на Windows 7:
Нажмите на меню " Пуск " в левом нижнем углу рабочего стола, щелкните правой кнопкой мыши на Мой комьютер, а затем нажмите кнопку Свойства.
Нажмите кнопку Дополнительные параметры системы в столбце слева.
В открывшемся диалоговом нажмите Переменные среды.
Выберите переменную PATH и нажмите редактировать.
Добавьте следующее в
PATH, в зависимости от того куда был установлен пакет SDK, например:;C:\Development\android-sdk\platform-tools;C:\Development\android-sdk\toolsСохраните значение и закройте оба диалоговые окна.
Установить пакеты SDK
Откройте Android SDK Manager (например, через терминал: android) и установить:
- Android 5.1.1 (API 22) platform SDK
- Android SDK Build-tools version 19.1.0 или выше
- Android Support Repository (Extras)
Смотрите Установка пакетов SDK для получения более подробной информации.
Настройка эмулятора
По умолчанию Android sdk не предоставляет никаких эмуляторов. Вы можете создать новый, запустив android в командной строке. Выбрать Tools → Manage AVDs (Android Virtual Devices), затем выберите любой элемент из Device Definitions в появившемся диалоговом окне:
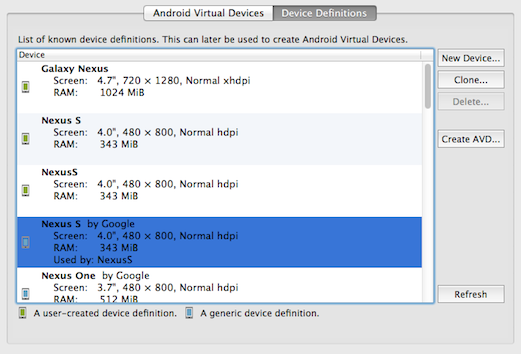
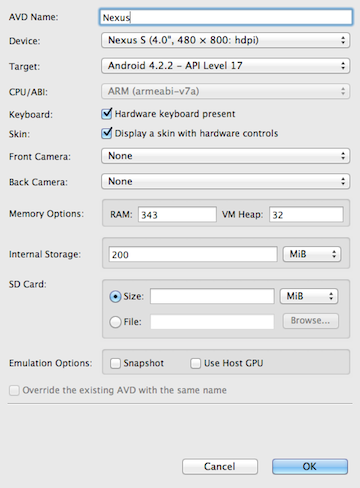
Нажмите Create AVD, при необходимости изменяя имя, затем нажмите ОК, чтобы принять изменения:
После этого AVD появляется в списке Android Virtual Devices:

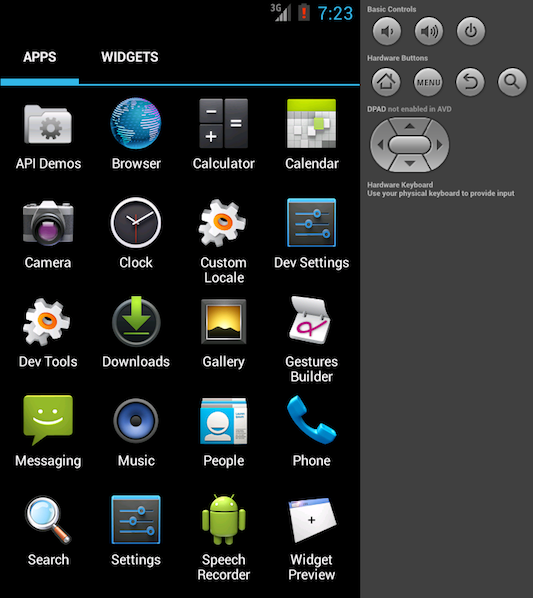
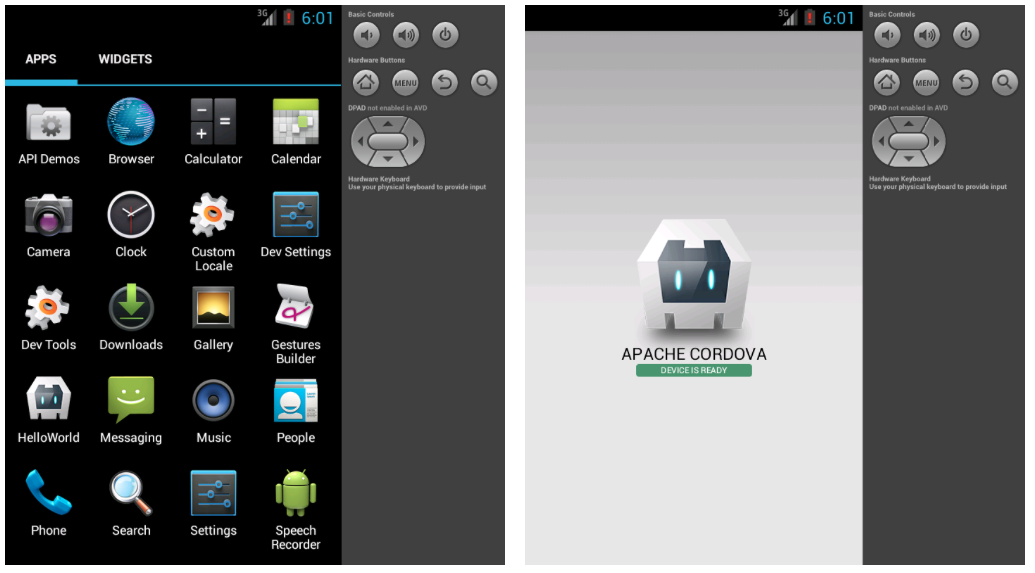
Чтобы открыть эмулятор как отдельное приложение, выберите AVD и нажать кнопку Start. Android запускается, также как он запускается на устройстве, с дополнительные элементы управления, доступными для аппаратных кнопок:
Для более быстрый восприятия можно использовать Ускорение виртуальной машины для повышения скорости выполнения. Многие современные процессоры предоставляют расширения для выполнения виртуальных машин более эффективно. Прежде чем пытаться использовать этот тип ускорения, необходимо определить, поддерживает ли процессор вашей текущей системы развития, одну из следующих технологий виртуализации:
- Технология Виртуализации Intel (VT-x, vmx) → Список процессоров поддерживающих Intel VT-x
- Виртуализация AMD (AMD-V, SVM), поддерживается только Linux (начиная с May 2006, все процессоры AMD включают AMD-V, за исключением Sempron).
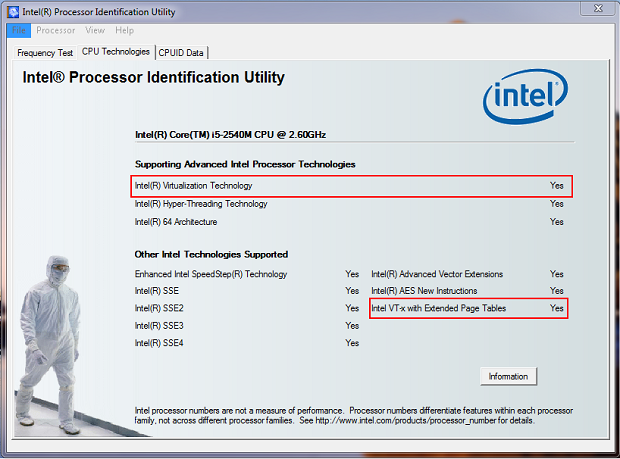
Еще один способ узнать, если ваш процессор поддерживает технологию VT-x, это путем выполнения Утилита идентификации процессора Intel, для Windows вы можете скачать ее с сайта Центр загрузки Intel , или можно использовать утилиту booteable, который является ОС-независимой.
После установки и выполнения Утилита идентификации процессора Intel в Windows, вы получите следующее окно, чтобы проверить, поддерживает ли ваш процессор технологии виртуализации:
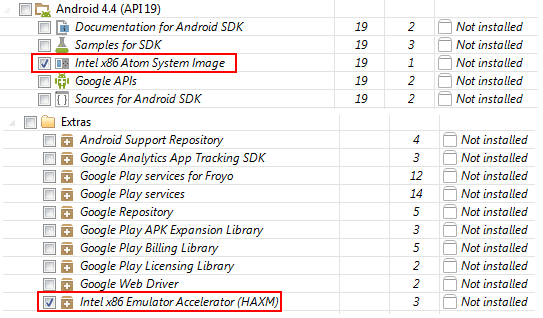
Для того, чтобы ускорить эмулятор, вам нужно скачать и установить один или несколько образов системы Intel x86 Atom, а также Менеджер выполнения аппаратного ускорения Intel (HAXM).
Откройте ваш Android SDK Manager и выберите образ системы Intel x86 Atom, для той версии, которую вы хотите проверить. Затем перейдите в раздел Extras и выберите Intel x86 Emulator Accelerator (HAXM) и установить эти пакеты:
После загрузки, запустите инсталлятор Intel, который доступен в вашем Android SDK в каталоге extras/intel/Hardware_Accelerated_Execution_Manager. Примечание: Если у вас есть проблемы с установкой пакета, вы можете найти более подробную информацию и пошаговое руководство в этой статье Intel.
Установить одно или несколько образов системы
Intel x86 Atom, а такжеIntel Hardware Accelerated Execution Manager, доступных в разделе Extras.Запустите инсталлятор Intel, который доступен в вашем Android SDK в каталоге
extras/intel/Hardware_Accelerated_Execution_Manager.Создайте новый AVD с выбрав в качестве цели образ Intel.
При запуске эмулятора, удостоверьтесь что нет сообщений об ошибке, указывающих на сбой загрузки модулей HAX.
Создание нового проекта
На данный момент для создания нового проекта можно выбрать между кросс-платформенным инструментом CLI, описанным в разделе "Интерфейс командной строки", или набор Android-ориентированных инструментов. Из каталога с исходным кодом, вот подход CLI:
    $ cordova create hello com.example.hello HelloWorld
    $ cd hello
    $ cordova platform add android
    $ cordova prepare              # or "cordova build"
Вот соотвествующий низкоуровневый подход для Unix и Windows:
    $ /path/to/cordova-android/bin/create /path/to/new/hello com.example.hello HelloWorld
    C:\path\to\cordova-android\bin\create.bat C:\path\to\new\hello com.example.hello HelloWorld
Построение проекта
Если вы используете CLI для разработки, каталога www проекта содержит исходные файлы. Запустите любой из нижеследующего в каталоге проекта для перепостроения приложения:
    $ cordova build                   # build all platforms that were added
    $ cordova build android           # build debug for only Android
    $ cordova build android --debug   # build debug for only Android
    $ cordova build android --release # build release for only Android
Если вы используете Android-ориентированные инструменты в разработке, используйте другой подход. После того как вы создали проект, исходный код приложения по умолчанию доступен в подкаталоге assets/www. Последующие команды доступны в подкаталоге cordova проекта.
Команда build очищает файлы проекта и перестраивает приложение. Вот синтаксис для Mac и Windows. Первая пара примеров создает отладочную информацию, и второй подписывает приложения для релиза:
    $ /path/to/project/cordova/build --debug
    C:\path\to\project\cordova\build.bat --debug

    $ /path/to/project/cordova/build --release
    C:\path\to\project\cordova\build.bat --release
Развертывание приложения
Чтобы развернуть приложение на эмуляторе или устройстве из командной строки можно использовать утилиту CLI cordova :
    $ cordova emulate android       #to deploy the app on a default android emulator
    $ cordova run android --device  #to deploy the app on a connected device
В противном случае используйте интерфейс альтернативной оболочки:
    $ /path/to/project/cordova/run --emulator
    $ /path/to/project/cordova/run --device
Можно использовать cordova run android --list чтобы увидеть все доступные цели и cordova run android --target=имя_устройства для запуска приложения на конкретном устройстве или эмуляторе (например, cordova run android --target="Nexus4_emulator").
Чтобы увидеть дополнительные параметры построения и запуска также можно использовать cordova run --help.
Эта команда установаливает приложение на главной странице и запускает его:
Когда вы запускаете приложение с помощью run, вы также собираете его с помощью build автоматически. Вы можете добавить дополнительные флаги --debug, --release, и --nobuild для управления как приложение будет построен, или даже когда перепостроение необходимо:
$ /path/to/project/cordova/run --emulator --nobuild
Другие команды
Следующие команды задают детальное протоколирование приложения, во время его работы:
    $ /path/to/project/cordova/log
    C:\path\to\project\cordova\log.bat
Следующие команды очищают файлы проекта:
    $ /path/to/project/cordova/clean
    C:\path\to\project\cordova\clean.bat
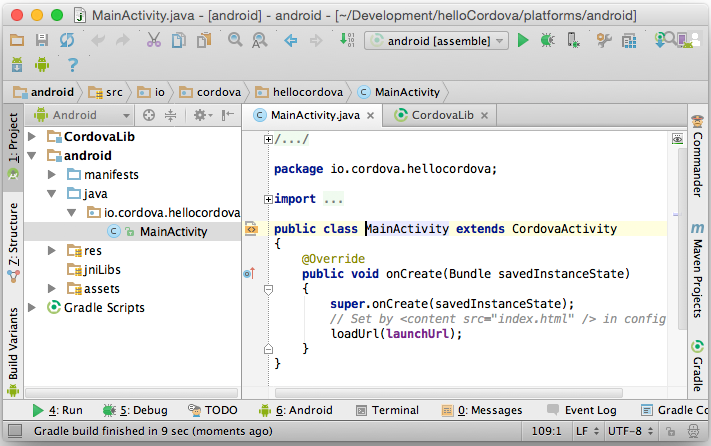
Откройте новый проект в SDK
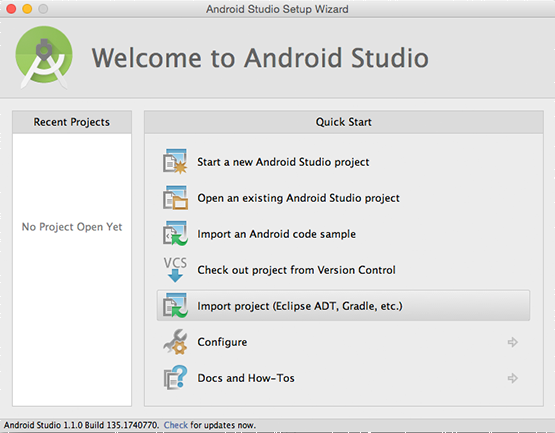
После того, как платформа android добавлена в ваш проект, вы можете открыть проект в Android Studio:
Запустите приложение Android Studio .
Выберите пункт Import Project (Eclipse ADT, Gradle, etc).
Выберите местоположение, где платформа android сохраняется (
ваш/каталог/проекта/platforms/android).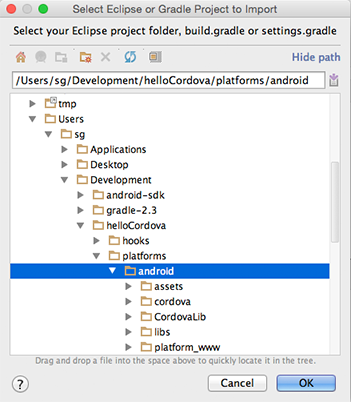
Для вопроса
Gradle Syncможно просто ответить Yes.
Все готово теперь и можно построить и запустить приложение непосредственно из Android студии.
Смотрите Введение в Android Studio и Построение и запуск из Android студии для более подробной информации.