Getting Started with Bada
This guide describes how to set up your development environment for Cordova and run a sample application. Note that Cordova used to be called PhoneGap, so some of the sites still use the old PhoneGap name.
-
Requirements
- Windows
- You need the bada 1.2 SDK to use cordova-bada (which is no longer available on Samsung's website)
-
Install SDK + Cordova
- Download and install the Bada SDK (Windows only).
- Download the latest copy of Cordova and extract its contents. We will be working with the bada directory.
-
Setup New Project
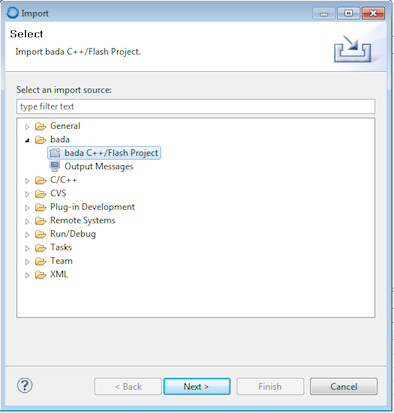
- In Bada IDE, select File -> Import project -> Bada C++ / Flash Project.
- Note: Bada 1.2 select "Bada Application Project"

- Make sure "Select root directory is checked" and then click Browse
-
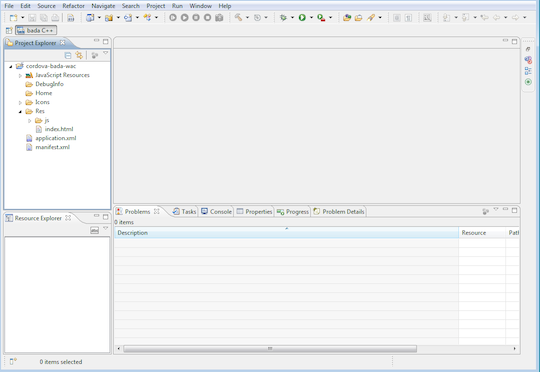
Browse to Cordova bada project folder (bada for 1.2 and bada-wac for 2.x) and select it. Make sure "Copy projects into workspace is checked"

-
Click "Finish"

Bada 2.x: Your HTML/CSS/Javascript code lives under the Res/ folder. Make sure your index.html contains the following two lines in the <head> section.
    <link href="osp://webapp/css/style.css" rel="stylesheet" type="text/css" />
    <script type="text/javascript" src="osp://webapp/js/webapp_core.js"></script>
Bada 1.2: Your HTML/CSS/Javascript code lives under the Res/ folder. Make sure your index.html contains the following line.
<script type="text/javascript" src="cordova/cordova.js"> </script>
5A. Deploy to Simulator
-
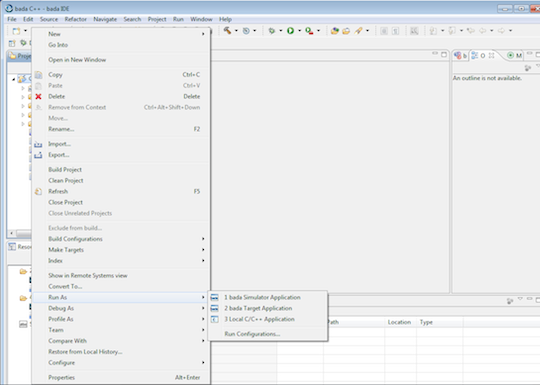
Bada 2.x: Right click on your project s folder and select Run As -> bada Emulator Web Application

-
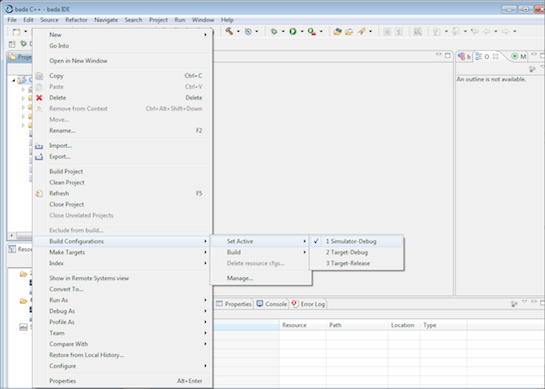
Bada 1.2: Right click on your project' folder and select Build configurations -> Set Active -> Simulator-Debug

-
Right click on your project's folder and select Run As -> bada Simulator Application. You need to close the emulator every time you update your app!
5B. Deploy to Device
- Make sure your device is properly configured
Bada 2.x: Right click on your project's folder and select Run As -> bada Target Web Application
Bada 1.2:
- Right click on your project's folder and select Build configurations -> Set Active -> Target-Debug
- Right click on your project's folder and select Run As -> bada Target Application. You need to close the emulator every time you update your app!