Getting Started with Windows Phone
This guide describes how to set up your development environment for Cordova and run a sample application. Note that Cordova used to be called PhoneGap, so some of the sites still use the old PhoneGap name.
Video Tutorials:
-
Requirements
- Windows 7 or Windows Vista with SP2
Note: Running in VM has issues, if you are on a Mac, you will need to setup a bootcamp partition with Windows 7 or Vista
Necessary for Installing on Device and Submitting to Market Place:
- Become an App Hub member.
-
Install SDK + Cordova
- Download and install Windows Phone SDK
- Download the latest copy of Cordova and extract its contents. We will be working with the Android directory.
-
Setup New Project
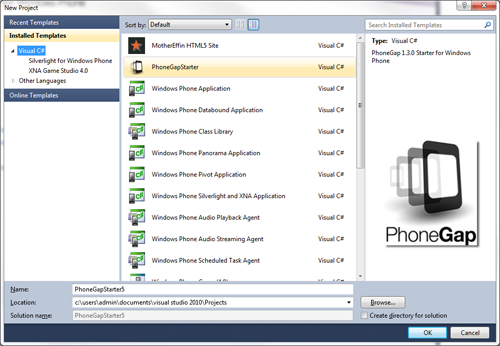
- Open Visual Studio Express for Windows Phone and choose New Project.
- Select CordovaStarter. ( the version number will be displayed in the template description )
-
Give your project a name, and select OK.

-
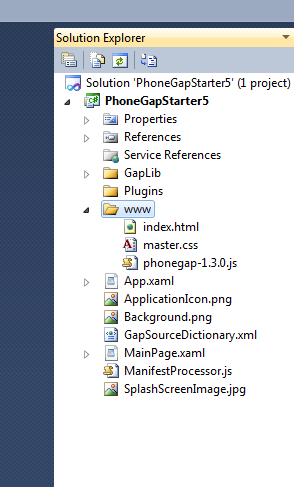
Review the project structure
- The 'www' folder contains your Cordova html/js/css and any other resources included in your app.
-
Any content that you add here needs to be a part of the Visual Studio project, and it must be set as content.

-
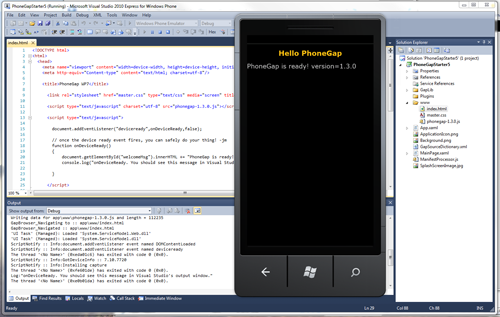
Build and Deploy to Emulator
- Make sure to have Windows Phone Emulator selected in the top drop-down menu.
-
Hit the green play button beside the Windows Phone Emulator drop-down menu to start debugging or press F5.


-
Build your project for the device
In order to test your application on a device, the device must be registered. Click here to read documentation on deploying and testing on your Windows Phone.
- Make sure your phone is connected, and the screen is unlocked
- In Visual Studio, select 'Windows Phone Device' from the top drop-down menu.
-
Hit the green play button beside the drop-down menu to start debugging or press F5.

Done!
You can also checkout more detailed version of this guide here.